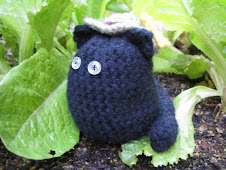
Here's a fast and easy crochet pattern just in time for Easter! I used Lily Sugar and Cream, but you can use whatever yarn you want. The size of the bunny depends on which yarn you choose. This one is about 3 inches tall and 1 1/2 inches wide. Enjoy!
This is a copyrighted pattern. Please do not copy or post this pattern on another site. Also, do not sell this pattern or make these items for commercial use. 
BUNNY
Materials List:- Cotton yarn like Lily Sugar and Cream.
- Polyester fiberfill stuffing
- Embroidery floss for eyes, nose and whiskers
- Plastic safety craft eyes - size 9 or small buttons (optional)
- Yarn needle
- Stitch marker (I just use a small piece of contrasting yarn to mark the end of each round.)
- Crochet hook size “G”
BodyMake magic ring*, ch 1
Round 1: sc 6 into a magic ring, pull tight.
Round 2: sc 2 into each sc around (12 sc)
Round 3: sc 1 into next sc, then sc 2 into next, around (18 sc)
Rounds 4-11 (8 rounds): sc around (18sc)
Round 8: (sc2tog, sc) around (12 sc)
If using craft eyes, insert now.
Stuff body with poly fiberfill.
Round 9: sc2tog around (6 sc)
Leave long yarn tail. Using a yarn needle, gather up the stitches in round 9 and pull tight to close. Weave yarn end into body.
Ears (make 2)Round 1: sc 4 into a magic ring, pull tight.
Round 2: (sc 1 into next sc, then sc 2 into next), twice (6 sc)
Rounds 3-7 (5 rounds): sc around (6 sc)
Join with sl st to next st. Fasten off, leaving long end of yarn.
TailUse a fluffy white yarn if desired.
Round 1: sc 6 into a magic ring, pull tight.
Round 2: sc 2 into each sc around (12 sc)
Round 3: sc2tog around (6 sc)
Fasten off leaving yarn tail. Stuff very lightly into a round puff shape. Use the yarn end to gather stitches of round 3. Pull the yarn end to close the tail.
AssemblyAttach the ears to the top of the body. Pull the yarn end of each ear through to the bottom of the body. Tie ends of both ears together at the bottom of the body and pull up to flatten out bottom. Tie securely and weave in yarn ends.
Attach the tail to the back of the body.
Embroider eye, nose and whiskers as desired.


